
When I found out about the closing of Merrie Christmas Park, the park I used to play at when I was little, I decided to do my science fair project on soil testing. Below is my experimental design and my final conclusions.
Abstract:
The purpose of this experiment was to test Coral Gables parks and fields for dangerous levels of lead and arsenic. There have been various tests lately that have shown that there are high levels of these toxins in the soil. There were two ways to test the soil that were used in this experiment. One way was a commercial lab. The other way was a soil testing kit. There was a kit especially for lead and another for arsenic.
The interesting thing was that the results from the two tests were completely different. In the case of the lead, the results from the lab were much lower than the results from the kit, which did show dangerous levels. With the arsenic, the results from the lab were much higher than the results from the kit. The lab did show dangerous levels.
The most lead was found in the Carver Middle School Field, with 75.5 mg/kg of lead according to the lab, and 400 or more mg/kg of lead according to the kit. The least amount of lead was found in the backyard with 12.5 mg/kg of lead according to the lab, and 400 or more mg/kg of lead according to the kit.
The most arsenic was found in Jaycee Park, with 14.3 mg/kg of arsenic according to the lab. The least arsenic was found in the backyard, with 1.9 mg/kg of arsenic according to the lab. But according to the kit results, the most arsenic was found in Catherine’s backyard with 0.01 mg/kg of arsenic and the least amount was found in the Carver field with 0.005 mg/kg.
Experimental Design:
Problem Statement:
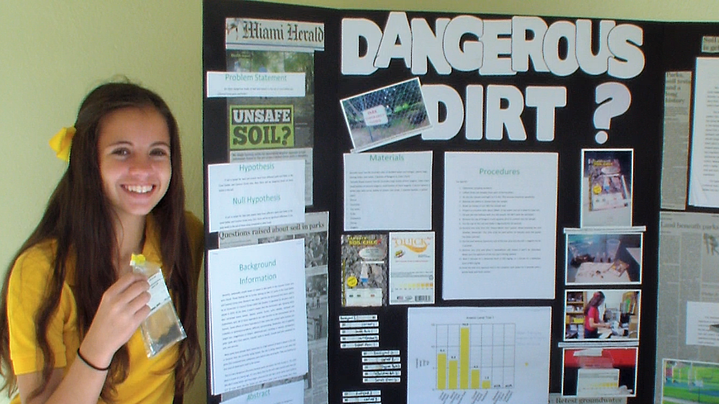
Are there dangerous levels of lead and arsenic in the soil of Coral Gables and Coconut Grove parks and fields?
Hypothesis:
If soil is tested for lead and arsenic level from different parks and fields in the Coral Gables and Coconut Grove area, then there will be dangerous levels of these toxins in the soil.
Materials:
• Sensafe Lead Test Kit (includes vials of distilled water and vinegar, plastic bags, testing strips, test tubes, 5 bottles of Reagent A, Color Chart)
• Sensafe Rapid Arsenic Test Kit (includes large bottle of first reagent, Color Chart, small bottles of second reagent, small bottles of third reagent, 3 plastic spoons, 2 white caps with turret, bottle of arsenic test strips, 2 reaction bottles, 2 yellow caps)
• Shovel
• Container
• Tap water
• Scale
• Stopwatch
• Gloves
• Goggles
Procedures:
For lead kit:
1. Determine sampling locations.
2. Collect three soil samples from each of the locations.
3. Air-dry the sample overnight so it is dry. This ensures maximum sensitivity.
4. Remove any debris or stones from the sample.
5. Break up clumps of soil. Mix the sample well.
6. Prepare a container with about 100mL of tap water and set it aside for later use.
7. Fill one test vial halfway with one soil sample. DO NOT pack the soil down.
8. Remove the cap of Reagent A and squeeze all of its content into the sample.
9. Put the cap on the vial and shake it vigorously for 30 seconds.
10. Remove one strip from the “Heavy Metal Test” packet. Avoid touching the oval window. (Reminder: The strip must be used within 10 minutes once the packet has been opened)
11. Dip the oval window (aperture) end of the test strip into the soil + reagent mix for 5 seconds.
12. Remove one strip and place it somewhere safe where it won’t be disturbed. Make sure the aperture of the test pad is facing upward.
13. Wait 5 minutes for a detection level of 200 mg/kg, or 1 minute for a detection level of 400 mg/kg.
14. Rinse the test strip aperture end in the container with water for 5 seconds with a gentle back-and-forth motion.
15. Remove the strip from the water container and immediately match the test strip color that appears through the aperture against the color chart on the Display Card by laying the test strip in the space provided underneath.
16. If the dominant color of test pad is green or gray, the lead level is below the detection limit. If the dominant color is pink, the lead level is above the detection limit.
17. If lead is detected, take soil samples to a commercial lab for further testing for levels of lead.
18. Repeat steps 1-16 for all soil samples.
For arsenic kit:
1. Follow steps 1-5 from the lead kit procedures.
2. Weigh out 0.5 g of the soil.
3. Add the 0.5 g of soil to the reaction bottle.
4. Fill the bottle to the upper marked line on the reaction bottle with 100mL of tap water.
5. Add 3 level pink spoonfuls of the first reagent to the reaction bottle.
6. Cap the bottle securely and shake vigorously for 15 seconds.
7. Uncap the reaction bottle and add 3 level red spoonfuls of the second reagent.
8. Cap the bottle securely and shake vigorously for 15 seconds.
9. Let the sample sit undisturbed for 2 minutes.
10. Uncap the bottle and add 3 level white spoonfuls of the third reagent.
11. Cap the bottle and shake vigorously for 5 seconds.
12. Remove the yellow mixing cap and replace it with the white cap with the turret up.
13. Remove one arsenic test strip and immediately insert it into the turret so that the test pad and red line are facing the back of the cap.
14. Insert the test strip until the red line is level with the top of the turret.
15. Close the turret. This will hold the test strip in place.
16. Let the reaction occur undisturbed in a well-ventilated area for 10 minutes.
17. After waiting 10 minutes, lift the turret and remove the test strip without touching the pad.
18. Match the reaction pad color with the correct color on the Color Chart.
19. Record your result.
20. If arsenic is detected, take soil sample to a commercial lab for further testing.
21. Repeat steps 1-20 for all soil samples.
Conclusion:
The purpose of this experiment was to investigate local parks and fields in the Coral Gables area to determine the amount of lead and arsenic that is in the soil. Recently, various parks have been closed or tested due to new uncovered information about their previous jobs. This experiment was conducted in order to find out if there really is lead or arsenic in these areas and if the amount is dangerous.
The major findings were that all of the soil that was tested contained lead and arsenic. The most amount of lead according to the commercial lab results was found in the Carver Middle School, with 75.5 mg/kg of lead. The least amount of lead was found in the backyard, with 12.5 mg/kg of lead. The most amount of arsenic was found in Jaycee Park, with 14.3 mg/kg of arsenic. The least amount of arsenic was found in the backyard, with 1.9 mg/kg of arsenic. This is significant because the level of lead that is actually dangerous is 450 mg/kg. The data from the commercial lab shows that none of these parks or fields has a high or dangerous level of lead. But, the soil testing kits showed otherwise. They showed that all soil samples had above 400 mg/kg of lead. It is also important to recognize that the dangerous level of arsenic is about 3 mg/kg. The commercial lab’s results showed that almost all soil samples had above 3 mg/kg of arsenic. Meanwhile, the soil that was tested with the soil testing kit stayed well below even 1 mg/kg. This proves that only one test is not sufficient in an experiment. Many tests and many trials need to take place in order to get a true and accurate result in any experiment.
The hypothesis was not supported by the data. The hypothesis was that Merrie Christmas Park would have the most lead and arsenic, but it turns out that Carver Middle had the most lead and Jaycee Park had the most arsenic. This could possibly have been because the soil that was collected from Merrie Christmas Park was collected from the very edge of the park, due to the fact that it was fenced off due to soil testing.
The findings from this experiment are very similar to other researchers’ findings. Soil testers all over Coral Gables are testing soil and finding the presence of lead and arsenic. That is what caused this problem to be known and researched.
It does make sense that Carver has a high level of lead. This is because Carver Middle School is situated in the middle of a community that used to have an incinerator called Old Smokey. This incinerator released a lot of ash, which went into the soil and, as we now know, resulted in high levels of lead. The reason Merrie Christmas Park was closed and fenced off is because it used to be a dump. So it makes sense for these places to have high levels of these toxins.
For further research, more locations could be tested for lead and arsenic, perhaps outside of the Coral Gables area or perhaps other areas around Coral Gables. A way to improve the experiment would be to dig deeper in the soil and to do more trials for each soil sample. Also, anyone who was to repeat this experiment would have to use a different way of getting levels of lead or arsenic. In this experiment, two very different results were extracted from the two different ways of testing: the soil testing kit and the commercial lab. The next person who does this experiment should find out which way gives the most accurate results.
Abstract:
The purpose of this experiment was to test Coral Gables parks and fields for dangerous levels of lead and arsenic. There have been various tests lately that have shown that there are high levels of these toxins in the soil. There were two ways to test the soil that were used in this experiment. One way was a commercial lab. The other way was a soil testing kit. There was a kit especially for lead and another for arsenic.
The interesting thing was that the results from the two tests were completely different. In the case of the lead, the results from the lab were much lower than the results from the kit, which did show dangerous levels. With the arsenic, the results from the lab were much higher than the results from the kit. The lab did show dangerous levels.
The most lead was found in the Carver Middle School Field, with 75.5 mg/kg of lead according to the lab, and 400 or more mg/kg of lead according to the kit. The least amount of lead was found in the backyard with 12.5 mg/kg of lead according to the lab, and 400 or more mg/kg of lead according to the kit.
The most arsenic was found in Jaycee Park, with 14.3 mg/kg of arsenic according to the lab. The least arsenic was found in the backyard, with 1.9 mg/kg of arsenic according to the lab. But according to the kit results, the most arsenic was found in Catherine’s backyard with 0.01 mg/kg of arsenic and the least amount was found in the Carver field with 0.005 mg/kg.
Experimental Design:
Problem Statement:
Are there dangerous levels of lead and arsenic in the soil of Coral Gables and Coconut Grove parks and fields?
Hypothesis:
If soil is tested for lead and arsenic level from different parks and fields in the Coral Gables and Coconut Grove area, then there will be dangerous levels of these toxins in the soil.
Materials:
• Sensafe Lead Test Kit (includes vials of distilled water and vinegar, plastic bags, testing strips, test tubes, 5 bottles of Reagent A, Color Chart)
• Sensafe Rapid Arsenic Test Kit (includes large bottle of first reagent, Color Chart, small bottles of second reagent, small bottles of third reagent, 3 plastic spoons, 2 white caps with turret, bottle of arsenic test strips, 2 reaction bottles, 2 yellow caps)
• Shovel
• Container
• Tap water
• Scale
• Stopwatch
• Gloves
• Goggles
Procedures:
For lead kit:
1. Determine sampling locations.
2. Collect three soil samples from each of the locations.
3. Air-dry the sample overnight so it is dry. This ensures maximum sensitivity.
4. Remove any debris or stones from the sample.
5. Break up clumps of soil. Mix the sample well.
6. Prepare a container with about 100mL of tap water and set it aside for later use.
7. Fill one test vial halfway with one soil sample. DO NOT pack the soil down.
8. Remove the cap of Reagent A and squeeze all of its content into the sample.
9. Put the cap on the vial and shake it vigorously for 30 seconds.
10. Remove one strip from the “Heavy Metal Test” packet. Avoid touching the oval window. (Reminder: The strip must be used within 10 minutes once the packet has been opened)
11. Dip the oval window (aperture) end of the test strip into the soil + reagent mix for 5 seconds.
12. Remove one strip and place it somewhere safe where it won’t be disturbed. Make sure the aperture of the test pad is facing upward.
13. Wait 5 minutes for a detection level of 200 mg/kg, or 1 minute for a detection level of 400 mg/kg.
14. Rinse the test strip aperture end in the container with water for 5 seconds with a gentle back-and-forth motion.
15. Remove the strip from the water container and immediately match the test strip color that appears through the aperture against the color chart on the Display Card by laying the test strip in the space provided underneath.
16. If the dominant color of test pad is green or gray, the lead level is below the detection limit. If the dominant color is pink, the lead level is above the detection limit.
17. If lead is detected, take soil samples to a commercial lab for further testing for levels of lead.
18. Repeat steps 1-16 for all soil samples.
For arsenic kit:
1. Follow steps 1-5 from the lead kit procedures.
2. Weigh out 0.5 g of the soil.
3. Add the 0.5 g of soil to the reaction bottle.
4. Fill the bottle to the upper marked line on the reaction bottle with 100mL of tap water.
5. Add 3 level pink spoonfuls of the first reagent to the reaction bottle.
6. Cap the bottle securely and shake vigorously for 15 seconds.
7. Uncap the reaction bottle and add 3 level red spoonfuls of the second reagent.
8. Cap the bottle securely and shake vigorously for 15 seconds.
9. Let the sample sit undisturbed for 2 minutes.
10. Uncap the bottle and add 3 level white spoonfuls of the third reagent.
11. Cap the bottle and shake vigorously for 5 seconds.
12. Remove the yellow mixing cap and replace it with the white cap with the turret up.
13. Remove one arsenic test strip and immediately insert it into the turret so that the test pad and red line are facing the back of the cap.
14. Insert the test strip until the red line is level with the top of the turret.
15. Close the turret. This will hold the test strip in place.
16. Let the reaction occur undisturbed in a well-ventilated area for 10 minutes.
17. After waiting 10 minutes, lift the turret and remove the test strip without touching the pad.
18. Match the reaction pad color with the correct color on the Color Chart.
19. Record your result.
20. If arsenic is detected, take soil sample to a commercial lab for further testing.
21. Repeat steps 1-20 for all soil samples.
Conclusion:
The purpose of this experiment was to investigate local parks and fields in the Coral Gables area to determine the amount of lead and arsenic that is in the soil. Recently, various parks have been closed or tested due to new uncovered information about their previous jobs. This experiment was conducted in order to find out if there really is lead or arsenic in these areas and if the amount is dangerous.
The major findings were that all of the soil that was tested contained lead and arsenic. The most amount of lead according to the commercial lab results was found in the Carver Middle School, with 75.5 mg/kg of lead. The least amount of lead was found in the backyard, with 12.5 mg/kg of lead. The most amount of arsenic was found in Jaycee Park, with 14.3 mg/kg of arsenic. The least amount of arsenic was found in the backyard, with 1.9 mg/kg of arsenic. This is significant because the level of lead that is actually dangerous is 450 mg/kg. The data from the commercial lab shows that none of these parks or fields has a high or dangerous level of lead. But, the soil testing kits showed otherwise. They showed that all soil samples had above 400 mg/kg of lead. It is also important to recognize that the dangerous level of arsenic is about 3 mg/kg. The commercial lab’s results showed that almost all soil samples had above 3 mg/kg of arsenic. Meanwhile, the soil that was tested with the soil testing kit stayed well below even 1 mg/kg. This proves that only one test is not sufficient in an experiment. Many tests and many trials need to take place in order to get a true and accurate result in any experiment.
The hypothesis was not supported by the data. The hypothesis was that Merrie Christmas Park would have the most lead and arsenic, but it turns out that Carver Middle had the most lead and Jaycee Park had the most arsenic. This could possibly have been because the soil that was collected from Merrie Christmas Park was collected from the very edge of the park, due to the fact that it was fenced off due to soil testing.
The findings from this experiment are very similar to other researchers’ findings. Soil testers all over Coral Gables are testing soil and finding the presence of lead and arsenic. That is what caused this problem to be known and researched.
It does make sense that Carver has a high level of lead. This is because Carver Middle School is situated in the middle of a community that used to have an incinerator called Old Smokey. This incinerator released a lot of ash, which went into the soil and, as we now know, resulted in high levels of lead. The reason Merrie Christmas Park was closed and fenced off is because it used to be a dump. So it makes sense for these places to have high levels of these toxins.
For further research, more locations could be tested for lead and arsenic, perhaps outside of the Coral Gables area or perhaps other areas around Coral Gables. A way to improve the experiment would be to dig deeper in the soil and to do more trials for each soil sample. Also, anyone who was to repeat this experiment would have to use a different way of getting levels of lead or arsenic. In this experiment, two very different results were extracted from the two different ways of testing: the soil testing kit and the commercial lab. The next person who does this experiment should find out which way gives the most accurate results.
